环境搭建
Ubuntu 16.04
安装环境的脚本
#!/bin/bash
apt-get update
apt-get install gcc g++ make wget openssl libssl-dev vim bzip2 -y
tar xzvf LuaJIT-2.0.4.tar.gz
cd LuaJIT-2.0.4
make install PREFIX=/usr/local/luajit
echo 'export LUAJIT_LIB=/usr/local/luajit/lib'>>/etc/bashrc
echo 'export LUAJIT_INC=/usr/local/luajit/include/luajit-2.0'>>/etc/bashrc
source /etc/bashrc
cd /root/nginx_lua  # 注意你把文件文件放在哪里就去哪里!!!
tar xf LuaJIT-2.0.4.tar.gz
tar -xzvf v0.10.9rc7.tar.gz -C /usr/local/src   # lua-nginx-module-0.10.9rc7
tar -xzvf v0.3.0.tar.gz -C /usr/local/src
tar jxvf pcre-8.42.tar.bz2 -C /usr/local/src/
tar zxvf zlib-1.2.11.tar.gz -C /usr/local/src/
tar -xzvf nginx-1.16.1.tar.gz -C /usr/local/src
ln -s /usr/local/nginx/sbin/nginx   /usr/bin/nginx
cd  /usr/local/src/nginx-1.16.1
./configure --prefix=/usr/local/nginx --add-module=/usr/local/src/ngx_devel_kit-0.3.0 --add-module=/usr/local/src/lua-nginx-module-0.10.9rc7 --with-http_ssl_module --with-pcre=/usr/local/src/pcre-8.42 --with-zlib=/usr/local/src/zlib-1.2.11 --with-http_stub_status_module --without-http-cache --with-http_gzip_static_module
make -j2
make install
cp /usr/local/luajit/lib/libluajit-5.1.so.2 /usr/local/lib/
echo "/usr/local/lib"  >>/etc/ld.so.conf
/sbin/ldconfig
mv  /usr/local/nginx/conf/nginx.conf  /tmp
cd /root/nginx_lua   # 注意你把文件文件放在哪里就去哪里!!!
cp   nginx.conf     /usr/local/nginx/conf/
cp  -r  lua  /usr/local/nginx/conf/
nginx
#curl 127.0.0.1/hello
#curl 127.0.0.1/lua
nginx.conf
worker_processes  1;
events {
    worker_connections  1024;
}
http {
    include       mime.types;
    default_type  application/octet-stream;
    sendfile        on;
    keepalive_timeout  65;
    server {
        listen       80;
        server_name  localhost;
        location / {
            root   html;
            index  index.html index.htm;
        }
        location /hello {
        default_type 'text/plain';
        content_by_lua 'ngx.say("hello,lua")';
        }
        location /lua {
        default_type 'text/html';
        content_by_lua_file conf/lua/test.lua;
        }
        error_page   500 502 503 504  /50x.html;
        location = /50x.html {
            root   html;
        }
    }
}
test.lua
ngx.say("hello lua");启动nginx:
nginx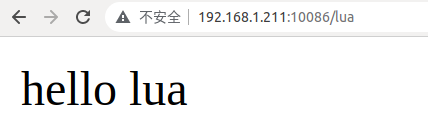
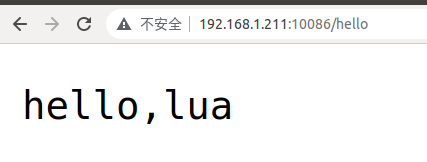
虽然都是hello lua ,但是我也不知道为什么字体显示的竟然不同
Ubuntu 18.04
在Ubuntu18.04中,其它的包不变,与上面16.04中一致,要变动 lua-nginx-module 包的版本,变动为lua-nginx-module-0.10.14rc7
...
tar -xzvf v0.10.14rc7.tar.gz -C /usr/local/src   # lua-nginx-module-0.10.14rc7
...
./configure --prefix=/usr/local/nginx --add-module=/usr/local/src/ngx_devel_kit-0.3.0 --add-module=/usr/local/src/lua-nginx-module-0.10.14rc7 --with-http_ssl_module --with-pcre=/usr/local/src/pcre-8.42 --with-zlib=/usr/local/src/zlib-1.2.11 --with-http_stub_status_module --without-http-cache --with-http_gzip_static_module

...
如果出现如下情况,那么就要替换 lua-nginx-module 的使用版本啦
devel_kit-0.3.0/src -I /home/usr/ngx_devel_kit-0.3.0/src -I /home/usr/ngx_devel_kit-0.3.0/objs -I objs/addon/ndk -I /usr/local/include/luajit-2.0 \
 -o objs/addon/src/ngx_http_lua_req_body.o \
 /home/usr/lua-nginx-module-0.10.8/src/ngx_http_lua_req_body.c
/home/usr/lua-nginx-module-0.10.8/src/ngx_http_lua_headers.c: In function 'ngx_http_lua_ngx_req_raw_header':
/home/usr/lua-nginx-module-0.10.8/src/ngx_http_lua_headers.c:151:15: error: incompatible types when assigning to type 'ngx_buf_t * {aka struct ngx_buf_s *}' from type 'ngx_chain_t {aka struct ngx_chain_s}'
             b = hc->busy[i];
               ^
/home/usr/lua-nginx-module-0.10.8/src/ngx_http_lua_headers.c:227:15: error: incompatible types when assigning to type 'ngx_buf_t * {aka struct ngx_buf_s *}' from type 'ngx_chain_t {aka struct ngx_chain_s}'
             b = hc->busy[i];
               ^
objs/Makefile:1465: recipe for target 'objs/addon/src/ngx_http_lua_headers.o' failed
make[1]: *** [objs/addon/src/ngx_http_lua_headers.o] Error 1
make[1]: *** Waiting for unfinished jobs....
make[1]: Leaving directory '/home/usr/nginx-1.17.10'
make: *** [build] Error 2
Makefile:8: recipe for target 'build' failed
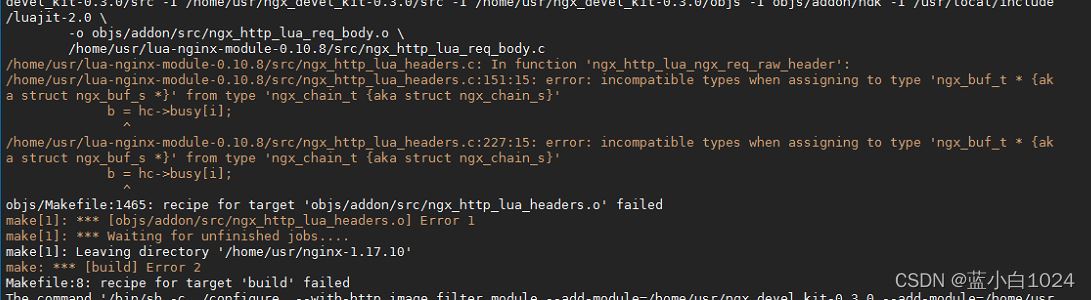
lua-nginx-module 各版本的下载地址,这个包的版本不同会导致各种错误,目前我调试啦16.04和18.04,这包如果实在装不上,就多试一下其它版本的有奇效
https://github.com/openresty/lua-nginx-module/tags
图片缩略图
图片缩略图的原理就是使用,操作系统的处理图片的convert命令
在调试图片缩略图前先在系统内测试一下如下命令
# /home/3.jpg  图片地址   						 # /home/3_100x100.jpg  切割后的图片存放地址
convert /home/3.jpg -resize 100x100 +profile "*" /home/3_100x100.jpg
一般是有的这个命令, 但是也有部分会出现 bash: convert: command not found
出现这个也不要慌,使用如下命令进行安装
apt-get install imagemagick -y好啦进入正题, 开始先编写lua脚本
ImageResizer.lua
local ext =  ngx.var.ext
local filepath_i = ngx.var.request_filepath
local filepath = filepath_i .. "." .. ext

local width = ngx.var.width
local height = ngx.var.height
local command = "convert " .. filepath .. " -resize " .. width .. "x" .. height .. " +profile \"*\" " .. filepath_i .. "_" .. width .. "x" .. height .. "." .. ext;
os.execute(command);

-- ↓ ↓ ↓ ↓ ↓ ↓ ↓ ↓ ↓ ↓ ↓ ↓ ↓ ↓ ↓ ↓ ↓ ↓
--这个方法是在lua脚本里面直接读取切好的缩略图,读取完通过 ngx.say 返回二进制
local filename = filepath_i .. "_" .. width .. "x" .. height .. "." .. ext;
local photo_size = io.open(filename,"rb")
local photo_data_size = photo_size:read("*a");
photo_size:close();
ngx.say(photo_data_size);
-- ↑ ↑ ↑ ↑ ↑ ↑ ↑ ↑ ↑ ↑ ↑ ↑ ↑ ↑ ↑ ↑ ↑ ↑

-- 如果不想在lua中读取图片的话,使用 ngx.exec(ngx.var.request_uri);
-- 这个表示重新请求这个地址  /xxx/1_100x100.jpg
--ngx.exec(ngx.var.request_uri);
nginx.conf
user root;
worker_processes  1;
events {
    worker_connections  1024;
}
http {
    include       mime.types;
    default_type  application/octet-stream;
    sendfile        on;
    keepalive_timeout  65;
    server {
        listen       80;
        server_name  localhost;
        location / {
            root   html;
            index  index.html index.htm;
        }
        location /hello {
        default_type 'text/plain';
        content_by_lua 'ngx.say("hello,lua")';
        }
        location /lua {
        default_type 'text/html';
        content_by_lua_file conf/lua/test.lua;
        }
	location ~* /photo/(.*)_(\d+)x(\d+)\.(jpg|png|jpeg|gif|JPG|PNG|JPEG|GIF)$ {
		root /;
                if (!-f $request_filename) {
                        lua_code_cache on;
                        set $request_filepath /$1;
                        set $width $2;
                        set $height $3;
                        set $ext $4;
                        # 加载外部 Lua 文件   注意!!! 这个文件因为要切割图片需要权限
                        # 加载外部 Lua 文件   注意!!! 这个文件因为要切割图片需要权限
                        # 加载外部 Lua 文件   注意!!! 这个文件因为要切割图片需要权限
                        content_by_lua_file conf/lua/ImageResizer.lua;  #加载外部 Lua 文件   注意!!! 这个文件需要权限
                }
        }
        location /photo/ {
            alias /;
        }

        error_page   500 502 503 504  /50x.html;
        location = /50x.html {
            root   html;
        }
    }
}
编写完之后
重启nginx
nginx -s reload访问
http://127.0.0.1/photo/home/3.jpg # 原图
http://127.0.0.1/photo/home/3_100x100.jpg # 缩略图
文中使用的文件 nginx_lua_jb51.rar
到此这篇关于Nginx中使用Lua脚本与图片的缩略图处理的实现的文章就介绍到这了,更多相关Nginx使用Lua脚本处理缩略图内容请搜索编程学习网以前的文章希望大家以后多多支持编程学习网!
本站部分内容来源互联网,如果有图片或者内容侵犯您的权益请联系我们删除!