目录
- 一、python-yml文件读写
- 更新yml的数值
- 二、python-xml文件读写
- 寻找 XML 节点
- 修改 XML 数据
- 建立 XML 结构
- XPath 搜索
- XML 排版
一、python-yml文件读写
使用库 :import yaml
安装:
pip install pyyaml 示例:
文件config2.yml
guard_url : 'https://www.xxxx.com'
app :
  chrome_files : 'C:\Program Files\Google\Chrome\Application\chrome.exe'
networkTime : 30
title : '公司'
读取yml数据
def read_yml(file):
    """读取yml,传入文件路径file"""
    f = open(file,'r',encoding="utf-8")   # 读取文件
    yml_config = yaml.load(f,Loader=yaml.FullLoader)    # Loader为了更加安全
    """Loader的几种加载方式
    BaseLoader - -仅加载最基本的YAML
    SafeLoader - -安全地加载YAML语言的子集。建议用于加载不受信任的输入。
    FullLoader - -加载完整的YAML语言。避免任意代码执行。这是当前(PyYAML5.1)默认加载器调用yaml.load(input)(发出警告后)。
 	UnsafeLoader - -(也称为Loader向后兼容性)原始的Loader代码,可以通过不受信任的数据输入轻松利用。"""
 	return yml_config
打印yml内容
yml_info=read_yml('config.yml')
print(yml_info['guard_url'])
print(yml_info['app'])
print((yml_info['app'])['chrome_files'])

"""
https:xxxx.com
{'chrome_files': 'C:\\Program Files\\Google\\Chrome\\Application\\chrome.exe'}
C:\Program Files\Google\Chrome\Application\chrome.exe
"""
插入到yml数据
def write_yml(file,data):
    # 写入数据:
    with open(file, "a",encoding='utf-8') as f:
        # data数据中有汉字时,加上:encoding='utf-8',allow_unicode=True
        f.write('\n')  # 插入到下一行
        yaml.dump(data, f, encoding='utf-8', allow_unicode=True)

data = {"S_data": {"test1": "hello"}, "Sdata2": {"name": "汉字"}}
write_yml('config2.yml',data=data)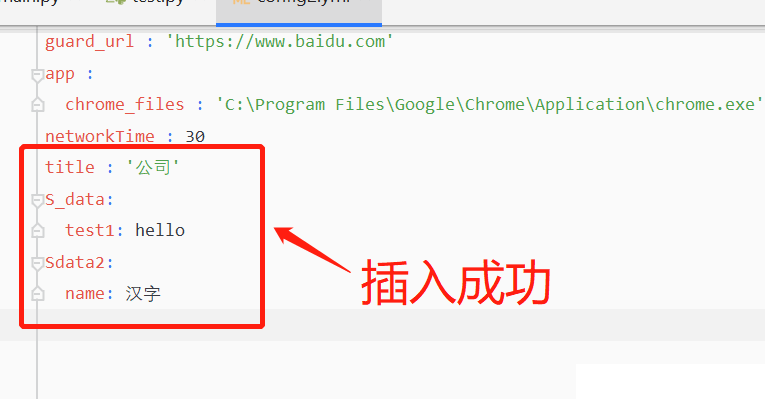
更新yml的数值
逻辑是完整读取然后更新数值后在完整写入。
def read_yml(file):
    """读取yml,传入文件路径file"""
    f = open(file, 'r', encoding="utf-8")  # 读取文件
    yml_config = yaml.load(f, Loader=yaml.FullLoader)  # Loader为了更加安全
    return yml_config
def updata_yaml(file):
	"""更新yml的数值"""
    old_data=read_yml(file) #读取文件数据
    old_data['title']='仔仔大哥哥' #修改读取的数据(
    with open(file, "w", encoding="utf-8") as f:
        yaml.dump(old_data,f,encoding='utf-8', allow_unicode=True)
updata_yaml('config2.yml')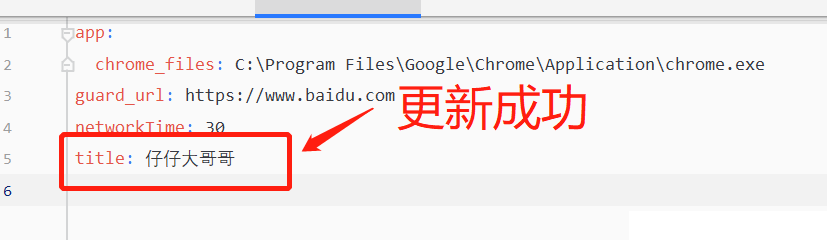
二、python-xml文件读写
使用库 :import xml
安装:系统自带
示例:
如果只是配置文件尽量使用yml来读写,
读取xml文件:
config.xml
<config>
    <id>905594711349653</id>
    <sec>0tn1jeerioj4x6lcugdd8xmzvm6w42tp</sec>
</config>
import xml.dom.minidom
dom = xml.dom.minidom.parse('config.xml')
root = dom.documentElement
def xml(suser):
suser = root.getElementsByTagName(suser)
return suser[0].firstChild.data
id = xml('id') # 进程名
print("打印ID:"+id)
"""
打印ID:905594711349653
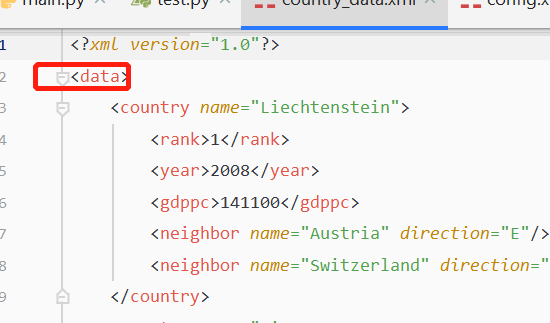
"""进阶country_data.xml
<?xml version="1.0"?>
<data>
    <country name="Liechtenstein">
        <rank>1</rank>
        <year>2008</year>
        <gdppc>141100</gdppc>
        <neighbor name="Austria" direction="E"/>
        <neighbor name="Switzerland" direction="W"/>
    </country>
    <country name="Singapore">
        <rank>4</rank>
        <year>2011</year>
        <gdppc>59900</gdppc>
        <neighbor name="Malaysia" direction="N"/>
    </country>
    <country name="Panama">
        <rank>68</rank>
        <year>2011</year>
        <gdppc>13600</gdppc>
        <neighbor name="Costa Rica" direction="W"/>
        <neighbor name="Colombia" direction="E"/>
    </country>
</data>
这里产生的 root 是一个 Element 物件,代表 XML 的根节点,每一个 Element 物件都有 tag 与 attrib 两个属性:
import xml.etree.ElementTree as ET

# 从文件加载并解析 XML 数据
tree = ET.parse('country_data.xml')
root = tree.getroot()
print(root.tag)  # 打印根节点名称
print(root.attrib)  # 打印根节点属性
# for 循环可以列出所有的子节点:

# 子节点与属性
for child in root:
    print(child.tag, child.attrib)
"""
data
{} # data 没有属性所以返回空
country {'name': 'Liechtenstein'}
country {'name': 'Singapore'}
country {'name': 'Panama'}
"""
也可以使用索引的方式存取任意的节点,透过 text 属性即可取得节点的内容:
print(root[0][1].text)
"""
2008
"""
可透过 get 直接取得指定的属性值:
# 取得指定的属性值
print(root[0][3].get('name'))
"""
Austria
"""
寻找 XML 节点
iter 可以在指定节点之下,以递回方式搜索所有子节点:
# 搜索所有子节点
for neighbor in root.iter('neighbor'):
    print(neighbor.attrib)
"""
{'name': 'Austria', 'direction': 'E'}
{'name': 'Switzerland', 'direction': 'W'}
{'name': 'Malaysia', 'direction': 'N'}
{'name': 'Costa Rica', 'direction': 'W'}
{'name': 'Colombia', 'direction': 'E'}
"""
findall 与 find 则是只从第一层子节点中搜索(不包含第二层以下),findall 会传回所有结果,而 find 则是只传回第一个找到的节点:
# 只从第一层子节点中搜索,传回所有找到的节点
for country in root.findall('country'):

    # 只从第一层子节点中搜索,传回第一个找到的节点
    rank = country.find('rank').text

    # 取得节点指定属性质
    name = country.get('name')

    print(name, rank)
"""
Liechtenstein 1
Singapore 4
Panama 68
"""
修改 XML 数据
XML 节点的数据可以透过 Element.text 来修改,而属性值则可以使用 Element.set() 来指定,若要将修改的结果写入 XML 文件,则可使用 ElementTree.write():
# 寻找 rank 节点
for rank in root.iter('rank'):
    # 将 rank 的数值加 1
    new_rank = int(rank.text) + 1

    # 设置新的 rank 值
    rank.text = str(new_rank)

    # 增加一个 updated 属性值
    rank.set('updated', 'yes')

# 写入 XML 文件
tree.write('output.xml')
编辑之后的 XML 文件内容会像这样:
<?xml version="1.0"?>
<data>
    <country name="Liechtenstein">
        <rank updated="yes">2</rank>
        <year>2008</year>
        <gdppc>141100</gdppc>
        <neighbor name="Austria" direction="E"/>
        <neighbor name="Switzerland" direction="W"/>
    </country>
    <country name="Singapore">
        <rank updated="yes">5</rank>
        <year>2011</year>
        <gdppc>59900</gdppc>
        <neighbor name="Malaysia" direction="N"/>
    </country>
    <country name="Panama">
        <rank updated="yes">69</rank>
        <year>2011</year>
        <gdppc>13600</gdppc>
        <neighbor name="Costa Rica" direction="W"/>
        <neighbor name="Colombia" direction="E"/>
    </country>
</data>
若要移除 XML 的节点,可以使用 Element.remove():
# 在第一层子节点钟寻找 country 节点
for country in root.findall('country'):
    # 取得 rank 数值
    rank = int(country.find('rank').text)

    # 若 rank 大于 50,则移除此节点
    if rank > 50:
        root.remove(country)

# 写入 XML 文件
tree.write('output.xml')
移除节点之后的 XML 文件内容会像这样:
<?xml version="1.0"?>
<data>
    <country name="Liechtenstein">
        <rank updated="yes">2</rank>
        <year>2008</year>
        <gdppc>141100</gdppc>
        <neighbor name="Austria" direction="E"/>
        <neighbor name="Switzerland" direction="W"/>
    </country>
    <country name="Singapore">
        <rank updated="yes">5</rank>
        <year>2011</year>
        <gdppc>59900</gdppc>
        <neighbor name="Malaysia" direction="N"/>
    </country>
</data>
建立 XML 结构
若要建立一个全新的 XML 结构,可以使用 Element 建立根节点,再以 SubElement() 加入子节点:
# 建立新的 XML 结构
orders = ET.Element('orders')

# 新增节点
order1 = ET.SubElement(orders, 'order')
order1.text = "My Order 1"
order1.set("new", "yes")

# 新增节点
order2 = ET.SubElement(orders, 'order')
order2.text = "My Order 2"
order2.set("new", "no")

# 输出 XML 原始数据
ET.dump(orders)
<orders><order new="yes">My Order 1</order><order new="no">My Order 2</order></orders>
XPath 搜索
XPath 可以让用户在 XML 结构中以较复杂的条件进行搜索,以下是一些常见的范例。
# 顶层节点
root.findall(".")

# 寻找「顶层节点 => country => neighbor」这样结构的节点
root.findall("./country/neighbor")

# 寻找 name 属性为 Singapore,且含有 year 子节点的节点
root.findall(".//year/..[@name='Singapore']")

# 寻找父节点 name 属性为 Singapore 的 year 节点
root.findall(".//*[@name='Singapore']/year")

# 寻找在同一层 neighbor 节点中排在第二位的那一个
root.findall(".//neighbor[2]")
XML 排版
若要对一般的 XML 文件内容进行自动排版,可以使用 lxml 模组的 etree:
import lxml.etree as etree

# 读取 XML 文件
root = etree.parse("country_data.xml")

# 输出排版的 XML 数据
print(etree.tostring(root, pretty_print=True, encoding="unicode"))

# 将排版的 XML 数据写入文件
root.write("pretty_print.xml", encoding="utf-8")
到此这篇关于python-yml文件读写与xml文件读写的文章就介绍到这了,更多相关 python文件读写内容请搜索我们以前的文章或继续浏览下面的相关文章希望大家以后多多支持我们!