引导页功能简介
方式一:
判断程序是否首次启动,如果是将GuidePageViewController作为窗口的根视图控制器。GuidePageViewController有三个子控件:一个UIScrollView、一个UIPageControl、一个UIButton(默认隐藏),UIScrollView有多个UIImageView子控件,当滚动到最后一页UIButton展示,点击立即体验然后将窗口的根视图控制器设置为UITabBarController;
方式二:
也可以直接将根视图控制器设置为UITabBarController, 然后在第一个导航控制器的视图上展示引导页视图,当点击立即体验再将引导页视图隐藏掉即可。
示例代码
@implementation AppDelegate

- (BOOL)application:(UIApplication *)application didFinishLaunchingWithOptions:(NSDictionary *)launchOptions {
 // 首次启动应用程序时进入到引导页页面(暂时没有判断,可通过NSUserDefault实现)
 self.window.rootViewController = [[GuidePageViewController alloc] init];
 return YES;
}
@end
引导页视图控制器GuidePageViewController
#import "GuidePageViewController.h"
#import "ViewController.h"

#define kScreenWidth ([UIScreen mainScreen].bounds.size.width)
#define kScreenHeight ([UIScreen mainScreen].bounds.size.height)
#define kGuidePageCount 4

@interface GuidePageViewController () <UIScrollViewDelegate>
@property (weak, nonatomic) UIPageControl *pageControl;
@property (weak, nonatomic) UIButton *startAppButton;
@end

@implementation GuidePageViewController

- (void)viewDidLoad {
 [super viewDidLoad];

 // UIScrollView
 UIScrollView *guidePageScrollView = [[UIScrollView alloc] initWithFrame:CGRectMake(0, 0, kScreenWidth, kScreenHeight)];
 guidePageScrollView.contentSize = CGSizeMake(kScreenWidth * kGuidePageCount, 0);
 guidePageScrollView.showsHorizontalScrollIndicator = NO;
 guidePageScrollView.pagingEnabled = YES;
 guidePageScrollView.bounces = NO;
 guidePageScrollView.delegate = self;
 for (int i = 0; i < kGuidePageCount; i++) {
  UIImageView *guideImageView = [[UIImageView alloc] initWithFrame:CGRectMake(kScreenWidth * i, 0, kScreenWidth, kScreenHeight)];
  guideImageView.image = [UIImage imageNamed:[NSString stringWithFormat:@"guide-page-%d", i + 1]];
  [guidePageScrollView addSubview:guideImageView];
 }
 [self.view addSubview:guidePageScrollView];

 // UIPageControl(分页)
 UIPageControl *pageControl = [[UIPageControl alloc] initWithFrame:CGRectMake((kScreenWidth - 100) / 2, kScreenHeight- 50, 100, 30)];
 pageControl.numberOfPages = kGuidePageCount;
 pageControl.currentPage = 0;
 pageControl.currentPageIndicatorTintColor = [UIColor greenColor];
 [self.view addSubview:pageControl];
 self.pageControl = pageControl;

 // UIButton(立即体验)
 UIButton *startAppButton = [UIButton buttonWithType:UIButtonTypeCustom];
 startAppButton.frame = CGRectMake((kScreenWidth - 100) / 2, 550, 100, 40);
 [startAppButton setTitle:@"立即体验" forState:UIControlStateNormal];
 startAppButton.backgroundColor = [UIColor grayColor];
 [startAppButton addTarget:self action:@selector(startAppAction) forControlEvents:UIControlEventTouchUpInside];
 startAppButton.hidden = YES;
 [self.view addSubview:startAppButton];
 _startAppButton = startAppButton;
}

- (void)scrollViewDidScroll:(UIScrollView *)scrollView {
 NSInteger currentPage = scrollView.contentOffset.x / kScreenWidth;
 self.pageControl.currentPage = currentPage;
 if (currentPage == (kGuidePageCount - 1)) {
  self.startAppButton.hidden = NO;
 }
}

- (void)startAppAction {
 // 根视图控制器一般是UITabBarController,这里简单实现
 [UIApplication sharedApplication].keyWindow.rootViewController = [[ViewController alloc] init];
}
@end
上述代码中的图片名称是写死在GuidePageViewController中的,根视图控制器也是写死的,如果其他App想要复用该功能,就要进入该代码修改这两哥地方,为了不修改一行代码就可以使用该功能,可以将这两个参数提取出来,初始化该控制器时作为参数传递
封装示例代码
初始化时以参数的形式将图片和根视图控制器传递给引导页视图控制器
@implementation AppDelegate
- (BOOL)application:(UIApplication *)application didFinishLaunchingWithOptions:(NSDictionary *)launchOptions {
 ViewController *viewController = [[ViewController alloc] init];
 self.window.rootViewController = [[GuidePageViewController alloc] initWithImages:@[@"guide-page-1", @"guide-page-2", @"guide-page-3", @"guide-page-4"] rootViewController:viewController];
 return YES;
}
@end
#import <UIKit/UIKit.h>
@interface GuidePageViewController : UIViewController

- (instancetype)initWithImages:(NSArray *)images rootViewController:(UIViewController *)rootViewController;

@end
在初始化方法中将引导页图片和根视图控制器保存起来,使用self.images.count获取引导页数量,引导页图片直接从images数组中获取
#import "GuidePageViewController.h"
#import "ViewController.h"

#define kScreenWidth ([UIScreen mainScreen].bounds.size.width)
#define kScreenHeight ([UIScreen mainScreen].bounds.size.height)

@interface GuidePageViewController () <UIScrollViewDelegate>
@property (weak, nonatomic) UIPageControl *pageControl;
@property (weak, nonatomic) UIButton *startAppButton;

@property (strong, nonatomic) NSArray *images;
@property (strong, nonatomic) UIViewController *rootViewController;
@end

@implementation GuidePageViewController

- (instancetype)initWithImages:(NSArray *)images rootViewController:(UIViewController *)rootViewController {
 if (self = [super init]) {
  _images = images;
  _rootViewController = rootViewController;
 }

 return self;
}

- (void)viewDidLoad {
 [super viewDidLoad];

 // UIScrollView
 UIScrollView *guidePageScrollView = [[UIScrollView alloc] initWithFrame:CGRectMake(0, 0, kScreenWidth, kScreenHeight)];
 guidePageScrollView.contentSize = CGSizeMake(kScreenWidth * self.images.count, 0);
 guidePageScrollView.showsHorizontalScrollIndicator = NO;
 guidePageScrollView.pagingEnabled = YES;
 guidePageScrollView.bounces = NO;
 guidePageScrollView.delegate = self;
 for (int i = 0; i < self.images.count; i++) {
  UIImageView *guideImageView = [[UIImageView alloc] initWithFrame:CGRectMake(kScreenWidth * i, 0, kScreenWidth, kScreenHeight)];
  guideImageView.image = [UIImage imageNamed:self.images[i]];
  [guidePageScrollView addSubview:guideImageView];
 }
 [self.view addSubview:guidePageScrollView];

 // UIPageControl
 UIPageControl *pageControl = [[UIPageControl alloc] initWithFrame:CGRectMake((kScreenWidth - 100) / 2, kScreenHeight- 50, 100, 30)];
 pageControl.numberOfPages = self.images.count;
 pageControl.currentPage = 0;
 pageControl.currentPageIndicatorTintColor = [UIColor greenColor];
 [self.view addSubview:pageControl];
 self.pageControl = pageControl;

 UIButton *startAppButton = [UIButton buttonWithType:UIButtonTypeCustom];
 startAppButton.frame = CGRectMake((kScreenWidth - 100) / 2, 550, 100, 40);
 [startAppButton setTitle:@"立即体验" forState:UIControlStateNormal];
 startAppButton.backgroundColor = [UIColor grayColor];
 [startAppButton addTarget:self action:@selector(startAppAction) forControlEvents:UIControlEventTouchUpInside];
 startAppButton.hidden = YES;
 [self.view addSubview:startAppButton];
 _startAppButton = startAppButton;
}

- (void)scrollViewDidScroll:(UIScrollView *)scrollView {
 NSInteger currentPage = scrollView.contentOffset.x / kScreenWidth;
 self.pageControl.currentPage = currentPage;
 if (currentPage == (self.images.count - 1)) {
  self.startAppButton.hidden = NO;
 }
}


- (void)startAppAction {
 [UIApplication sharedApplication].keyWindow.rootViewController = self.rootViewController;
}
@end
终极解决方案
直接使用github上的开源功能即可GitHub引导页
1、创建出所有引导页EAIntroPage
2、创建引导页视图EAIntroView 并设置代理
3、显示引导页视图
创建出所有引导页EAIntroPage
// basic: 标题和描述
EAIntroPage *page1 = [EAIntroPage page];
page1.title = @"Hello world";
page1.desc = sampleDescription1;
// custom
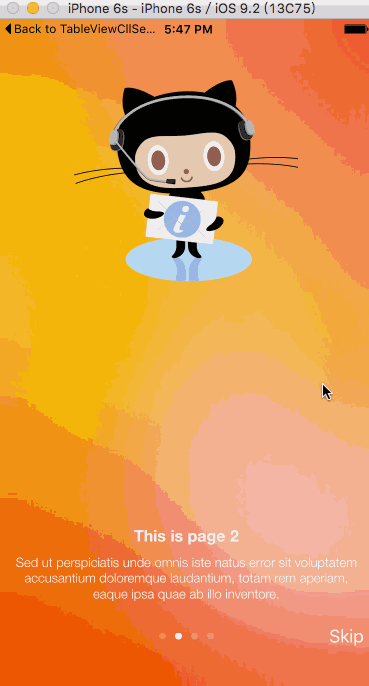
EAIntroPage *page2 = [EAIntroPage page];
page2.title = @"This is page 2";
page2.titleFont = [UIFont fontWithName:@"Georgia-BoldItalic" size:20];
page2.titlePositionY = 220;
page2.desc = sampleDescription2;
page2.descFont = [UIFont fontWithName:@"Georgia-Italic" size:18];
page2.descPositionY = 200;
page2.titleIconView = [[UIImageView alloc] initWithImage:[UIImage imageNamed:@"title2"]];
page2.titleIconPositionY = 100;
// custom view from nib
EAIntroPage *page3 = [EAIntroPage pageWithCustomViewFromNibNamed:@"IntroPage"];
page3.bgImage = [UIImage imageNamed:@"bg2"];
创建引导页视图EAIntroView 并设置代理
EAIntroView *intro = [[EAIntroView alloc] initWithFrame:self.view.bounds andPages:@[page1,page2,page3,page4]];
intro.delegate=self;
显示引导页视图
[intro showInView:self.view animateDuration:0.0];
以上就是本文的全部内容,希望对大家的学习有所帮助,也希望大家多多支持得得之家。